A few years ago I hosted a Capture the Flag (CTF) hacking event in which I used AWS as a cloud provider. Without prior experience with AWS, I remember I spent quite some time getting the EC2 instance up and running with the correct storage, performance and security configuration, installing and securely configuring the server and deploying the fbctf dashboard. I learnt a lot messing around with the infrastructure, but I actually wanted to start creating the challenges for the event!
In this article I'll explain a very easy way of running your own Internet-facing CTFd dashboard in DigitalOcean using the CTFd Docker image. At the end I'll provide a script that fully automates this entire process.
Contents
- The CTFd dashboard
- Install Docker
- Setup DigitalOcean
- Create a DigitalOcean Droplet
- Run a Docker container inside the Droplet
- The Script
- Cleaning up
If you're in a hurry and just want to deploy the dashboard via the script, make sure you went through the install Docker and setup DigitalOcean steps. Then just skip to the script to start deploying.
The CTFd dashboard
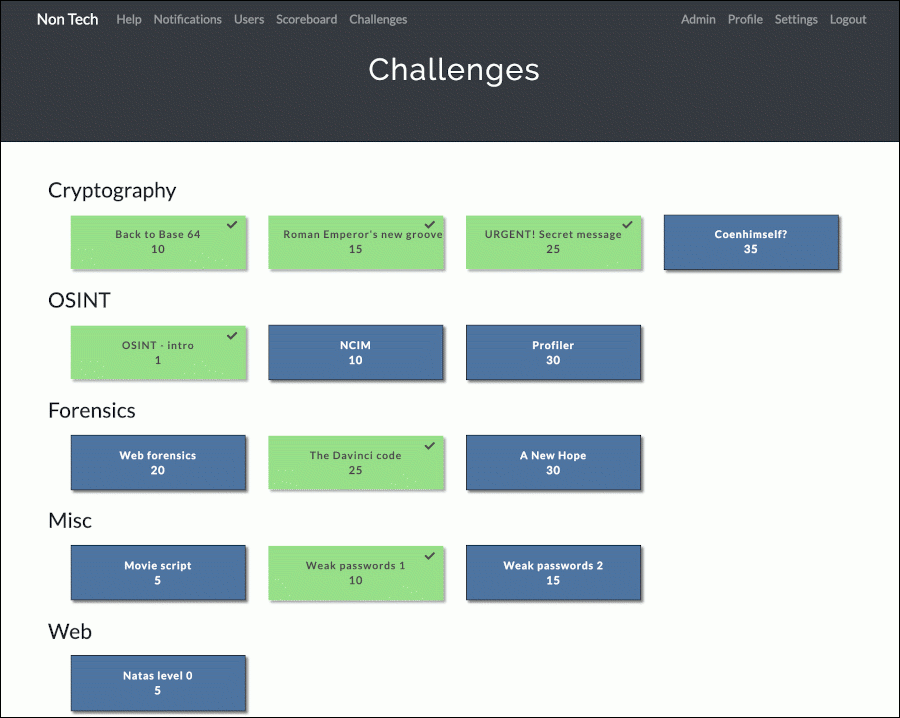
Before we start, let's first briefly introduce the Capture the Flag dashboard we're deploying in this article. CTFd is a free, open-source Capture The Flag framework that is easy to setup and use. It has support for plugins and themes and requires few resources to run. Like most CTF dashboards it has a graph that shows the scores over time, allows participants to compete individually or in teams and provides the option for the host to view all participants' submissions, backup/restore the challenges and event status and scores. What I really like, is the simplicity in which you can make new challenges and set interdependencies if you want challenges to become available after others have been solved. For more information, read the CTFd documentation.
Install Docker
The goal is to get the CTFd dashboard running, that is accessible via the Internet. For this we will be using Docker to deploy a containerized version of CTFd.
Use one of the following links to install Docker for your local operating system:
- Docker Desktop for Mac
- Docker Desktop for Windows
- If you're running an older Mac or Windows machine that does not meet the requirements of Docker Desktop, you can try to install Docker Toolbox.
After installation you should have the docker and docker-machine commandline tools we will be using for the deployment.
Setup DigitalOcean
Disclaimer: I have professional experience with Microsoft Azure, Google Cloud, Amazon AWS and DigitalOcean as cloud providers, each with its own pros and cons. For this personal use case, I found DigitalOcean to provide great value, good performance and helpdesk responsiveness and is easy to setup and teardown. This is why I chose DigitalOcean as a cloudprovider for my CTF dashboard. In no way am I affiliated with DigitalOcean, nor did I receive any sponsoring from them (yet lol).
Note: One concern I often hear when people switch to cloud hosting, is the pricing. Indeed, it is a good idea to closely monitor your resources to avoid unexpected surprises. However, CTFd is a light-weight solution that doesn't require many cloud resources. I ran a CTF for 15 people with the configuration proposed in this article, that cost me less than 2 cents to host.
We will need a DigitalOcean account and an API token. The latter is used to access the DigitalOcean environment via the API.
Step 1. Create an account on DigitalOcean.com
Make sure to check if there is a good promotion code available when setting up your account. Those may provide you up to $100 in credits.
Step 2. Generate a personal access token (API Token)
Open your DigitalOcean environment on https://cloud.digitalocean.com/. In the menu on the left, expand Manage and select API. Go to the Tokens/Keys tab where you can see your personal access tokens. Click the Generate New Token button.
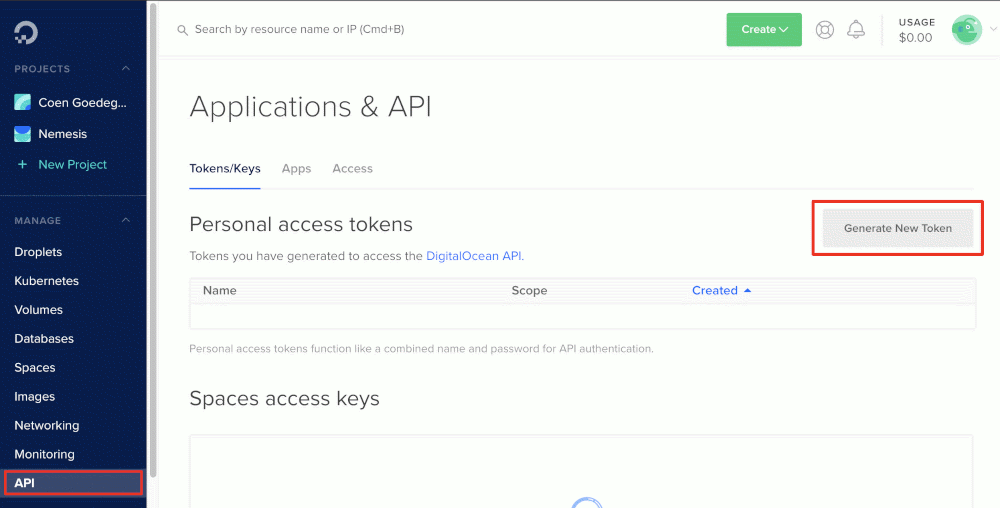
Clicking the Generate New Token button will popup a dialog. In this dialog, fill in a token name for your reference and make sure the write option is checked. Then click Generate Token.

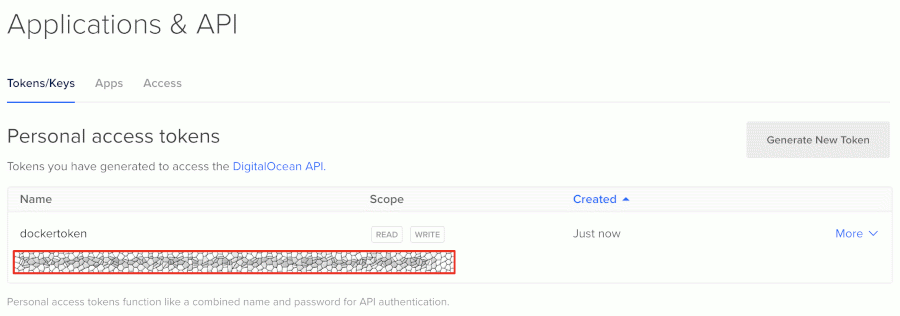
After the dialog closed, the token code will be visible in the list of personal access tokens. Make sure to copy this code to a safe place, because this is the last time it will be shown. If you lose it, you will need to generate a new token.
Create a DigitalOcean Droplet
DigitalOcean Droplets are Linux-based virtual machines (VMs) that run on top of virtualized hardware. Each Droplet you create is a new server you can use, either standalone or as part of a larger, cloud-based infrastructure.
We will create a Droplet to host our Docker container. For this we will use the Docker machine tool that lets you install and manage the Docker Engine on remote virtual hosts like, in our case, a Droplet. The following command creates a Droplet:
docker-machine create --digitalocean-size <droplet-size> --driver digitalocean --digitalocean-access-token <api-token> <droplet-name>
The 3 variables for this call:
droplet-size: The size slug of the Droplet (e.g.s-1vcpu-1gb). Check this website for an up-to-date overview of all available sizes or read the API documentation and pricing details.api-token: The DigitalOcean personal access token you generated in the previous chapterdroplet-name: A custom name of the Droplet you're creating (e.g. CTFd)
After creating the Droplet, you can check the IP address it's running on by executing the command docker-machine ip <droplet-name>

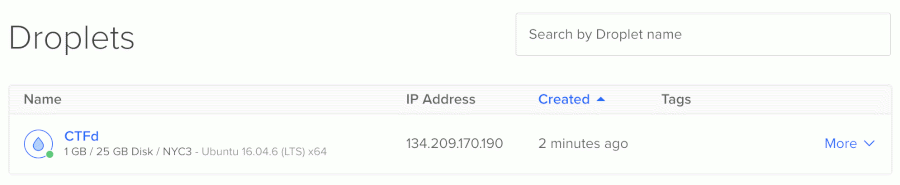
The Droplet in my example is running on 134.209.170.190
Finding your Droplet via DigitalOcean
Open your DigitalOcean environment. In the menu expand Manage and click Droplets. You will see your newly created Droplet.
I used s-1vcpu-1gb for the droplet-size and named it CTFd, which resulted in the configuration displayed below.
Connecting to your Droplet
You can check your Docker machines by running the command docker-machine ls.

Notice the asterisk * in the Active column. When you create a new machine, your Docker command shell automatically connects to it and the asterisk in the Active column indicates the currently connected machine. In case your machine is not the active host, run the following two commands in a sequence:
docker-machine env <droplet-name>
eval $(docker-machine env <droplet-name>)
This will connect the command shell to the Docker machine (Droplet) with the specified droplet name. From then on, any Docker commands will be executed on that droplet, instead of your local machine.
Running a Docker container in your Droplet
With the Docker engine running on your newly created Droplet and your command shell connected to it, it is time to spin up our Docker container from the CTFd Docker image.
This can be done by executing the following command:
docker run -d -p <dashboard-port>:8000 <docker-image>
This command has 3 variables:
dashboard-port: The port on which the CTFd dashboard will be exposed to the outside world. If your CTFd dashboard's IP address was 10.10.10.10 and you set the dashboard-port to 80, the participants can access the dashboard viahttp://10.10.10.108000: The internal port on which CTFd is exposed to the underlying host system is port 8000. If you haven't made any custom modifications to CTFd, I suggest you leave it at this number. Note that if you're running other Docker containers, you may need to change this port to the port exposed by that particular container.docker-image: The Docker image for CTFd. The standard Docker image for CTFd isctfd/ctfd:latest(see https://hub.docker.com/u/ctfd/)
For example:
docker run -d -p 80:8000 ctfd/ctfd:latest
The Docker engine on the Droplet will pull the image from the DockerHub and run it.
The script
In order to make my life a bit easier, and hopefully yours as well, I automated the entire process mentioned in this article in one single bash script.
You can find this ctfdeploy.sh script here: https://github.com/CoenGoedegebure/scripts/blob/master/ctfdeploy.sh
The script runs a few precondition checks, then prompts for the Droplet name and size, the dashboard-port and the DigitalOcean API token. When the script is finished, it will output the ip-address and port on which your CTFd dashboard is running.
Cleaning up
You can stop and remove your Droplet by running the following two commands, with droplet-name being the name you gave your Droplet at the creation step.
docker-machine stop <droplet-name>
docker-machine rm <droplet-name>
After these two commands, the Droplet is gracefully stopped and removed from your DigitalOcean environment. It should also have disappeared from the Droplets overview on https://cloud.digitalocean.com/. You will only be charged for the time the Droplet was up.
